Monday, December 15, 2014
Five tips for Christmas time in the music room

Five tips for Christmas time in the music room


Ah, Christmas time in the music room....kids are CRAZY with excitement and have a hard time focusing and sitting still. I have a hard time focusing too, so I can understand! Over the years, though, I have noticed a few things that have worked well for getting students in grades K-5 still engaged in music lessons. Here are my five tips...

Christmas Time in the Music Room: Great tips for your music lessons in December!


#1: Sing holiday music!
One of the best things about December, in my opinion, is holiday music. I love singing Christmas songs--and so do the kids--and have also found a few Hanukkah songs I absolutely adore. For several years now, I have directed a holiday singalong at my school, in which the entire school comes down half an hour before their holiday parties begin to sing through 10 or so songs. We sing like we are in an assembly and I have the lyrics posted on a screen. Parents are also welcome to sing...and it is a PACKED HOUSE! It's really wonderful to hear the entire school community singing together.
So in the week of and the week before the singalong, I practice all of the songs with the students, which they love. It also gives me a chance to discuss all the December holidays and why we sing during holidays. Just make sure that all of your students are allowed to sing holiday music, as some religions prohibit this; for those students, you may want to have another fun activity they can complete, or you can talk to their classroom teacher about what they do for that student if they have any holiday activities. If you're looking to put together a singalong, I created this singalong set below to help save time:


When I put together the singalong, I have several Christmas songs, a couple Hanukkah songs, and at least one Kwanzaa song. Click here to see one of my all-time favorite Hanukkah songs (thanks to my friend Naomi Cohen for sharing it with me!) As far as Kwanzaa goes, I typically sing an African folk song with students, since Kwanzaa celebrates African culture (I just haven't found a whole lot of accessible songs specifically about Kwanzaa, and love teaching about culture through these new songs.) The resource below is an absolute treasure of Kenyan songs...click the picture to see it on West Music.


The book comes with an incredibly helpful DVD that can be used to teach students a song AND show them a performance of Kenyan students or adults singing. I've decided to do a different song each year for the entire school so by the time they leave 5th grade, they've learned several songs and have watched several of the performances!

#2: Get students moving!
Students are so excited during this season, they need to MOVE! Quick movement activities to holiday music are a great way to keep students engaged and excited during class. I found this fun "Jingle Bells" movement activity on YouTube:


I also love these movement cards by Lindsay Jervis:


#3: Sing to them
Sometimes after moving, students need to just sit and listen to you sing...it can have a beautiful calming effect on them!

Here are some of my favorite picture books for this time of year (just click the picture to see the book on Amazon.)


#4: Assess them...without them knowing it!
I love to make games out of assessments, so that students think they are just playing a game but really, you are also gauging how well they know a particular concept! The holiday season is a perfect time to do this, as for me, it is nearing the end of the marking period, and I need to see how well they know the concepts I'm teaching them. Here is a free ta and ti-ti set I made for Christmas time in the music room:


One of my students' favorite games this year has been "Santa's Stuck"...check out the rhythmic and melodic sets below:


#5: Have them listen!
There are so many wonderful recordings of Christmas and holiday music; this is a great time of year to do some listening activities!

My favorite recording of Feliz Navidad, which I have students listen to with the book above, is by Chino Espinoza.

There are several classical music pieces that are Christmas-related, but of course, no Christmas is complete without the Nutcracker! I love doing a comparison of the standard Nutcracker by Tchaikovsky with Duke Ellington's Nutcracker.

Tracy King at Mrs. King Rocks put together this really helpful blog post with TONS of Nutcracker resources.

Cori Bloom put together this wonderful Christmas listening freebie (make sure to rate it after downloading!)


What are your favorite Christmas/ winter holiday activities? Please comment below, and HAPPY HOLIDAYS!!

Thursday, December 4, 2014
10 Tips for iPad group work

10 Tips for iPad group work

This year, I was so fortunate to receive a grant from my district for the purchase of eight iPad minis along with the apps GarageBand and MadPad HD.

As you can imagine, I was beside myself in excitement!!! Eight iPads, only for my classroom!??! I have been using only one iPad for the last two years, so having eight iPads was thrilling to ponder!

It has been a fun and exciting journey so far...with some small bumps along the way. I thought I'd share my tips and strategies to help you in case you are also lucky enough to have more than one iPad in your classroom, but not lucky enough to have an iPad for every single student--or if you are hoping to purchase a set of iPads for your classroom. Although I am a music teacher, many of these tips should also work in any grade-level classroom.


Tip #1: Get sturdy cases


Kids are kids, and they will drop expensive things. (Let's be honest, I have dropped more than a few expensive things myself!) So the sturdier, the better. The purchase of the case above came with my grant, so each iPad is protected. I love these cases, because not only are they sturdy, but students can move the handle so the iPad is propped up. Click on the picture above to see the cases on Amazon.

Tip #2: Think about how you will charge the iPads
Some districts require teachers to get a syncing cart for any iPads you have. After purchasing mine with the grant, I realized it doesn't actually sync more than one iPad at a time (not sure why it is called a syncing cart...) but it does charge all the iPads at once. Make sure you look into this detail...you may want to get a portable cart, or you may want one that sits on your counter like mine does.

Tip #3: Decide ahead of time how students will be split into groups
Depending on how your classroom is set up, you may want to always have students in the same groups, or to change up the groups depending on the project. Since I am only having students work on iPads for 10-25 minutes per class--depending on the grade level--for now, I am having students stay in the same group. It did take a bit of time to figure out who was in each group for each class. I strategically put students in groups who I thought could work together well. With 8 iPads and at least 22 students per class, I usually have 3 kids per group, but with some of my larger classes (like 4th grade, where the 5th class is sprinkled in among the other 4 classes) all of my groups have 4 students. I typed up my list for each class and labeled them by group #'s, so I can easily see who is in which group.

Tip #4: Give each group a spot to sit
Before students touched the iPads for the first time, I showed each group where to sit when they were working. I call these their "iPad spots," so when I need them to quickly transition I just say "Please go to your iPad spots!" I like all students to be sitting on or near the carpet--I'll explain why soon!

Tip #5: Give each student in the group a number
After figuring out who was in which group, I also gave students numbers within their group. This way, I could easily give directions and have students rotate. For example, in one lesson, the #1's can come and get the iPads, and in another lesson the #2's can get the iPads. If the #1 student has gotten a chance to explore on the iPad or complete a task, I then ask all groups to hand the iPad to the #2 student, and then to the #3 student. This makes it much easier to rotate and be fair so that each student gets the same amount of time on the iPad. If some groups have 3 and some have 4, the groups with 4 students all individually get a turn, and the groups with 3 students can all play at the same time the last round.

Tip #6: Think about how/if to number the iPads
When I first had students work on iPads, I gave them whichever iPad was closest out of the syncing cart. But then I realized that there were a few reasons I might want to give them the same iPad each time--just in case they did something they weren't supposed to (take pictures, delete apps, etc.), or if I wanted to listen to a recording a group created, I'd know which iPad to check. So at first, I thought I'd use painter's tape and number the tape, as then it would be easy to peel off.
Well, duh, that's the problem, it's too easy to peel off!
OK, onto plan B. I used file folder labels and placed them on the back of the iPad....and then one of those stickers got caught on one of the trays in my syncing cart...hmm...okay, onto plan C!
I found this and decided it was just what I needed:

All of my cases are black, so the silver sharpie showed up perfectly! I flipped each iPad case over and numbered them on the back. Worked much better than tape or labels!

Tip #7: Think about how/ if to project
When I first got my own iPad, I was excited to project it onto my SMART board, and then found out it wasn't as easy I thought (see this blog post about that ordeal...Itools has since quit working, unfortunately!) Since writing that blog post, I found out that an HDMI cable hooked up from my iPad to my TV works well when wanting to show students something on my iPad.
Since working with iPads in small groups, though, I haven't yet tried projecting, but I can see this being helpful, especially when working with GarageBand (since there are some complex steps that are hard to explain.) Now that I have iPads owned by the school, I could try Airserver, I could use my HDMI cable hooked up to my TV, or if I had an elmo I could quickly show students that way. So far this year, though, I've just been showing students with one of the class iPads....but I think in some cases, as stated above, projecting would be a better option.

Tip #8: Let kids experiment and explore
So far this year, my first, second, third, and fourth graders have been working with MadPad HD, and my fifth graders have been working with GarageBand. I love both apps, not only because they can create music with both, but because the sky's the limit with what you can do. At first I thought about giving them very specific tasks with both apps when they were acquainting themselves with each, but then realized...they just need to explore and experiment. I do give them tasks, but the structure is at times a bit loose in order to let students play around and get to know each app...then they will be ready to create!
If you're interested in what I've done with MadPad, I will soon be posting a unit to TpT. For GarageBand, I took several lessons to have students experiment with each of the different instruments (smart strings, smart drums, etc.) I showed them the different things they might do with each but then just let them take turns exploring. Now we are working on ABA compositions using this great set by Music and Technology.

Tip #9: Have a plan for when you need to give directions
The first few times I gave directions while students had iPads in hand, I often heard a car door slamming or a guitar strumming (as these are common MadPad and GarageBand sounds!) So then I came up with an idea: have all groups sit by or on the carpet, so when I say, "Please gently turn your iPad over and place it screen down on the carpet," they can do that and be ready to listen without the temptation of the iPad.
If you have the cases I do, you might want to add "Make sure the iPad is FLAT on the carpet." Take my word for it...otherwise sounds will still happen!

Tip #10: Be prepared to learn from your students
I was a bit nervous about the amount of directions I would have to give first graders to get to a certain part of the app, let alone record themselves then head back into photos to retrieve those videos.
I've had to help out a bit here and there, but I'll be honest--these kids know their iPads! (I should know that, thinking about how incredible my 2-year-old is with my iPad!) They know what they are doing, and can show you a thing or two...and if one child in the group doesn't get how to do something, no worries, another kid in the group can usually figure it out!

My students have really enjoyed creating on iPads so far! I hope yours do too! Have any other tips? Please leave them below.

Monday, November 24, 2014
Five Favorite Pins of November

Five Favorite Pins of November

Hi everyone! It's almost the end of November, so here is my five favorite pins linky party!

Five favorite music education pins of November, including a channel of singing games, a bulletin board, and more!

Here is my list for this month; just click each picture to view that pin.

#1: Plastic plates as dry erase boards


If you want to do work (like rhythmic dictation) but can't afford dry erase boards, this would be a great alternative!

#2: Dynamics behavior chart


What a great way to teach dynamics AND monitor behavior!

#3: Fancy words bulletin board


This bulletin board was created by a classroom teacher, but I think it could totally work in a music classroom, using words such as "ostinato" and "dynamics." So cute!

#4: "Before you tell the teacher" freebie


Here is a free poster for your classroom...such a clever way to address tattling!

#5: YouTube channel of singing games


An entire channel of singing games? Sign me up!

What are your five favorite pins of the month? Feel free to comment below, and make sure to click the link below to see all of the pins of other music bloggers!


Monday, October 27, 2014
Songs and Activities for Halloween Week

Songs and Activities for Halloween Week


Since it's the week of Halloween, I thought I'd blog about activities and songs I'm doing this week!

Songs and Activities for Halloween Week: Great ideas for your music lessons!

I'll be honest, I haven't always done many holiday activities in my music classroom. Halloween is one of my favorite holidays, and I love dark, spooky music. However, in the past, I've had some classes on one lesson while other classes were four lessons behind because of my schedule (with some classes coming Monday and Friday and some classes coming Tuesday and Thursday, it's easy to not be on the same lesson!) Now with my new block schedule (which I will blog about soon), all my classes are on typically on the same lesson each week, which is great! It also allows me to focus on the time of the year as well as the concept. I can't say that all of my activities for the week are Halloween-related, but here are the Halloween-themed activities, songs, and books we are doing this week!

With first grade, I will read/ sing "There was an old lady who swallowed a bat," a book I picked up at the book fair. So cute! (You can view it by clicking below.)


I will then transition into "There was an old woman all skin and bones," which is an absolute must for this time of the year! You can see the music here at the new Holy Names online folk song collection (which you should visit anyway...it looks great!)

My Kindergarteners and first graders have also had fun with ghost melodies; I wrote a blog post about this activity here.

With second grade, we've been practicing la with my Halloween patterns for sol, mi, and la, which you can see by clicking below:


When you throw a squishy ball at the SMART board or tap the image of your choice from your computer, it brings up a pattern for you to sing, like this:

It's a great way to practice melodic reading!

I've also done some activities by other music sellers, like Totally Tuned In Teacher's Creepy Cauldron for quarter rest and Cowgirl Composition's In the Hall of the Mountain King powerpoint

My third graders are practicing lines on the treble clef staff, so I decided to make this game for them (click on the first picture below to see the product):


Students have to read the note behind the door of the haunted house, then identify it, like shown below:


If students answer correctly, they find a trick-or-treater (my third graders had fun looking at the costumes for all of the trick-or-treaters) but beware, if you answer incorrectly, you find a ghost!

My fourth graders know the lines and spaces on the treble clef staff, so they played the lines and spaces version of Haunted House.

My fourth graders are also beginning to prepare ti-tika, so they are learning the Spanish chant "El Reloj," with this slideshow from "Songs and Activities for Autumn" (which is actually for the Day of the Dead.)


Speaking of the Songs and Activities for Autumn set, I'm also using the rhythm charts with my first graders to prepare ta and ti-ti, by having students read left to right, right to left, diagonally, however, as they clap the rhythm and figure out whether each word is a long or short-short! Here is the Halloween chart from the set:


I hope you are able to do some of these activities this week, or that I've at least given you some inspiration to make some activities of your own! Happy Halloween!


Saturday, October 25, 2014
On the day you were born: Performance ideas

On the day you were born: Performance ideas


This week was pretty busy and stressful, as my fifth graders performed their program, "On the day you were born" on Thursday. I have to say, though, that this was one of my favorite performances of my career. Part of it is that I've had these students since first grade. Part of it is that I just loved the material I chose for the program (and so did the kids, which doesn't happen all the time with fifth grade!) So I thought I'd share which songs and dances I did with the program, and other performance details, in case you would like to perform it as well.

Looking for musical performance ideas? This blog post has great ideas for creating your own program based off of a children's book!

I should start by saying that I've never done a canned musical. I have lots of reasons why I don't...and I'm really not trying to pass judgment on anyone who does. Canned musicals just don't work for me. They seem to take LOTS of time to put together, the kids need LOTS of work on memorizing lines, you have to stress LOTS about scenery and costumes, you get the idea. I'm sure there are some of you out there who don't find it stressful and have found ways to put together those types of musicals without taking away too much time for your curriculum, but I'd rather create the musical myself. I really love the creative process--figuring out the book or theme, choosing songs and dances, etc. I also love that I can choose some material that the students already know, and can also choose material that aligns with their curriculum. Yes, it still does take some time away from curriculum, but not nearly as much as it might.

I should also say that my administrator, the parents, and the staff have all been super supportive of this type of musical. I have heard other music teachers say that their community expects a certain type of musical, so you have to do what you're comfortable with. I will say, though, that there is still some kind of scenery, there are still "parts," there is still the "cute factor" (especially for the little ones!) and yet, the kids are so involved with the music-making and can be very successful.

So I based this program off the book, "On the day you were born," by Debra Frasier. This post may be easier to understand if you have the book with you as you read (as I cannot include all of the text of the book because of copyright.) But hopefully it will give you a good idea of how I put it together!

I divided all of the text in the book into one or two sentences, with 30 or so narrators reading lines and music and dances interspersed throughout. We start with the beginning line of the book. After the word "animal," the students sang "Ah Poor Bird" in unison, and then in round. You could choose to use any animal song that you want, though!

Then a few more narrators come up and read the next part of the book. After "...the sun and the moon moved in their places," I had two classes perform "Little Silver Moon" with Orff instruments. I will soon update this blog with a link to the book from which I got the song and arrangement, but you could also use any song about the sun, moon, or earth.

A few more narrators come up and read (and as they read, I project the image from that page in the book onto a screen from my computer.) After "spinning the night into light," I had one class perform "Oh, how lovely is the evening," a folk dance from Teaching Movement and Dance/ Rhythmically Moving. (If you do not have Rhythmically Moving, it is a MUST HAVE...it's like a folk dancing bible!)

A couple more narrators come up and read. After "from dawn until dusk," I have students sing "This little light of mine." I think this was one of my favorite selections...they sang so beautifully, and I just love that song! I used this picture book to teach the song to them.

One narrator comes up. After he/she reads "to your windowsill," I had students first sing "Tideo" in unison, then in round.

Two more narrators come up. After "a rising tide washed the beach clean for your footprints..." I had one class perform "Waves of Tory." I have taught a few different versions of the folk dance, but for this program, I simplified the dance seen in this video (I ran out of time to teach the dance the way it's performed here; instead I just had kids go forward 4, backwards 4, switch sides by going under. Repeat with the other side going under. Then peel the orange and repeat.)


One more narrator comes up. After reading "and rained you a welcome across Earth's green lands," one class performed "Once in a field," an Israeli dance from Rhythmically Moving, and another class performed "I love a rainy night," which is a line dance to the famous song by Eddie Rabbit. I found the dance in Sanna Longden's More Folk Dance Music for Kids and Teachers, and OH MY GOODNESS, my fifth graders LOVED this dance. It's not often you have kids coming every day begging to do this dance, but they loved it, and so did the audience!!

Two more narrators come up, and after "invisibly protecting all living things on earth," I had one class perform their arrangement of "Who has seen the wind," and then another class perform their arrangement of the same song. I will have to blog about the process of writing an arrangement for this song in another post...kids loved the ownership! For this song and for "Little Silver Moon," I also chose haiku poems that the students had written during class, using the brainstorming sheet found in this set.

Three more narrators came up, and after "a circle of people singing with voices familiar and clear," I had students sing the "Peace Round" first in unison then in round. I also had two circles singing and dancing in a round. Here is a video of second graders from another school singing; the melody I used was the same, but for the dance, we did sway x 4, step close x 2 to the right, step close x 2 to the left, then in and out.


Then I had all of the students say "Welcome to the spinning world!" and a narrator said, "The people sang..." Then all the students said, "Welcome to the green earth!" and a narrator said, "The people sang..." Another narrator said, "And as they washed..." and then all the students said "We are so glad you've come!"

After that, we all sang "Siyahamba." I had an arrangement from a book; again, I will look up the book and post a link to that arrangement soon, but you can use whichever arrangement you want.

For decorations, my art teacher created stars, an earth, and a planet with a ring with cardboard, and then he and the librarian painted them (and then the art teacher and PE teacher hung them for me...how awesome is that?!!?) As stated above, I also projected images from the book throughout the program. 

Of course, you could change the songs however you want; the idea is to choose songs and dances whose lyrics and motions match what is going on in the story.

The fifth graders really seemed to enjoy this performance. They loved the music and took ownership of what they were able to create. Hopefully I've explained everything so that you could recreate it or adapt it for your own students. 

Looking for other musical programs that utilize folk songs and dances from your curriculum? Try the sets here. Let me know how it goes, and have fun!

Saturday, October 18, 2014
Interactive Notebooks in the Music Room

Interactive Notebooks in the Music Room


So in the last few months, I have heard a lot about interactive notebooks in the grade-level classroom. Out of curiosity, I clicked on a few listings on Teachers Pay Teachers to check them out. I found math and language arts notebooks, and thought, "Eh, I don't think this could be adapted for the music classroom." Let's face it, we get so little time with them as it is, how would we have time for notebooks too?

Then a few weeks ago, I found this blog post on the TpT site, through the newsletter, and again read it out of curiosity. There were some interesting points about how using notebooks helps deepen understanding and makes the learning individual to each student, so I again pondered what that might look like in the music classroom. With as much active music making I want for my students, I can see it being hard to work in notebooks--especially with the cutting and pasting involved--but I reasoned that if the notebooks weren't used every time that they could be used effectively.

But before I go any further, I should probably talk about what interactive notebooks are, because it took me a while to figure that out! I understood that they were notebooks that each child had (and in a music classroom, students could probably keep their notebooks in a crate or some kind of bin)  but I didn't quite understand what was interactive about them. I bought a language arts interactive notebook just to further understand, and that only confused me more, because the set I bought just seemed to be worksheets that were small enough to cut out and paste down into a notebook. So I explored more and found that just like anything, there is a huge variety of interactive notebooks, from worksheets that you paste down to foldables, to a mix. (For a math sample, click here.) Students would cut the sheets out, glue them down, and sometimes would also cut flaps so they can write answers beneath.

So why use interactive notebooks in the music room? I thought long and hard about this. As stated above, I worried that there would simply be not enough time and not worth the cutting and gluing. But I did come up with some solid reasons why I wanted to try them in my own classroom. Here are my top five reasons to use interactive notebooks in the music room.

Interactive notebooks in the music room: Why and how to use them!

#1: Interactive notebooks are fun!
My two-year-old Macy loves books that have flaps that you can lift to see beneath. This is actually quite similar to interactive notebooks! It's a twist on the traditional worksheet.

#2: Interactive notebooks can help us meet the NCCAS standards
The NCCAS standards are a bit overwhelming to many of us (I wrote a blog post about that here.) How do we go about having students making thoughtful decisions about what to perform, or how to reflect on a composer's intent? The notebooks could provide that opportunity--instead of just having a whole-class discussion, you could provide students with the chance to write down their thoughts about some deeper-level questions and topics.

#3: Interactive notebooks can provide students the chance to deepen their understanding through writing
I've heard many stories of music teachers being forced to include writing journals into every music lesson. I've often rolled my eyes and groaned at these stories (and I still don't think it's right to force a music teacher to have students write in journals; this should happen organically, when students are ready for the learning, and when the teacher deems it appropriate...but that's a whole other blog post!) However, using interactive notebooks as a way for students to journal is a great way to deepen understanding and to connect language arts with music.

#4: Interactive notebooks can allow students to see their previous learning
Having a notebook that students use the whole year can help students remember what we've covered and where we are going. Students might also see answers they want to change or answers they want to elaborate on once they have a deeper understanding!

#5: Interactive notebooks can serve as a portfolio
Last year, I read a great book called "Assessing the Developing Child Musician: A Guide for General Music Teachers" by Timothy Brophy. One of the chapters discussed having a portfolio of student work. I loved that idea, but the logistics of that seemed very difficult to me. Would I sort everything into file folders? Would I be up to my ears with filing? The notebooks could be used as a sort of portfolio, organizing much of the work for the year into one notebook. Many of the pages could be used as formative and/or summative assessments, and could track students' learning throughout the entire year.

If you are wanting to learn more about interactive notebooks, here are a few links I found helpful:
After I read the blog posts above, and figured out the purpose for using interactive notebooks in my classroom, I decided to create my own.  Here is my finished project, an interactive notebook for third grade which you can purchase here:

Interactive notebooks in the music room: Why and how to use them!

Thanks to my daughter Jenna for helping to color and paste...she had lots of fun!

I had read on another blog post by a classroom teacher that divider tabs were helpful, so I divided my notebook up into the four NCCAS strands: Performing, Responding, Connecting, and Creating.

Here is the Performing page, with a list of "I can" statements that students can check off as they complete pages in the notebook:


Here is another page from the notebook; students would listen to a piece of music and describe what they hear for each section:

Interactive notebooks in the music room: Why and how to use them!


Here is an explanation of how to cut and fold one of the printables in the notebook (thanks to Hello Literacy and Krista Wallden for the cute clip art!):


I am only now starting my journey with interactive notebooks, so I am not claiming to be an expert. As I continue on the journey, I will add more grade-level sets to my TpT store and will continue to tweak and add. I will also blog more about how to put together notebooks (without taking loads of time to cut and paste!), how to store, and how students deepen their understanding through the use of interactive notebooks. 

Do you use interactive notebooks in the music room? Please comment below with any suggestions or questions!
Tuesday, October 14, 2014
Five Favorite Pins of October

Five Favorite Pins of October

Hi everyone! It's been quite a while since I did a "five favorite pins" post, so here goes!

5 Favorite Music Education pins of October: Apps, Taiko drumming, and more!

Here is my list for this month; just click each picture to view that pin.

#1: Free Ipad Apps for Classroom Management

This blog post has several different iPads apps that are not only great for classroom management, but are FREE!

#2: 21 Books about Farm Animals

I love using children's books about animals for vocal exploration, so I'm excited to check these books out!

#3: Make-believe in the music room

Lori from Sweet Sounds offers lots of great strategies to make Kindergarten music lessons magical!

#4: Taiko drummer YouTube video
I love to do taiko drumming pieces with my students on bucket drums, so this would be an awesome video to help them see how exciting taiko drumming can be! It's a bit long so you could just show them part of the video if you didn't have enough time.

#5: Rhythm video
5 Favorite Music Education pins of October: Rhythm video, Taiko drumming, and more!

After students learn whole note (and know quarter note, half note, and eighth notes), you could show this clever video to help reinforce those rhythms.

For more pins like this, make sure to follow me on Pinterest.

What are your five favorite pins of the month? Feel free to comment below, and make sure to check out the pins of the pinners below!


Thursday, October 2, 2014
Variety in assessment

Variety in assessment


My district has been focusing on formative assessment strategies for years, and for that,  I am very grateful. We as teachers have been provided with tons of professional development about the topic of assessment, with strategies to gauge understanding and adapt instruction.

One "a-ha" moment I had on my own, though, without reading an article or hearing anything about it at a meeting, is the idea of variety. While I had heard about providing various formative and summative assessments to students, my "a-ha" moment was about the purpose of variety.

The purpose for variety became clear to me one day when I was assessing students on their performance of a piece on Orff instruments. My good friend Andrew Ellingsen had presented a wonderful piece at an OAKE conference that I had decided to use with my own students.  (Andrew, by the way, is an incredibly talented presenter if you are looking for someone to ask to present!) When Andrew first presented this piece, I thought, "Wow, I LOVE this piece, but my students don't have as much experience playing as his do...so I'm not sure they would be successful." Well, as it turns out, just like anything else, if you break down the piece into manageable steps (as Andrew showed us), they can in fact play pretty complicated music! 

So I stood there that day, listening to my students in centers perform this piece, and I was so excited by how well some of them did! And something seemed very interesting to me...some of these students who were rocking it out on this piece had never really "shined" in music before. They had done fine previously, but had never stood out. And now, they were very fluidly playing this piece of music.

But...this was the first time I had assessed them on playing an entire piece on barred instruments (instead of just playing a bourdon or alternating bourdon.) So before this, I had no idea that they would excel so quickly on the instruments. Before this...maybe I had not provided enough variety in my assessments.

As I looked back on my assessments from previous years and previous marking periods, I realized that sometimes I'd have two or three assessments all focused on rhythm, or all focused on melody. I decided that, if at all possible, I should provide my students with a wide variety of ways to show their musical understanding during any given marking period. I even found support for this idea online, in an article called "Methods of Assessment" by William Badders. He states, "It is clear that different kinds of information must be gathered about students by using different types of assessments. The types of assessments that are used will measure a variety of aspects of student learning, conceptual development, and skill acquisition and application. The use of a diverse set of data-collection formats will yield a deeper and more meaningful understanding of what children know and are able to do, which is, after all, the primary purpose of assessment."

So today I thought I'd offer  a wide variety of ways to assess your students during any given marking period, as a means to not only collect a wide variety of data, but for your students to show you how well they understand the many aspects of musicianship.

Assessment idea #1: Playing instruments

Variety in assessment: How to offer a variety of assessment opportunities in the music classroom!


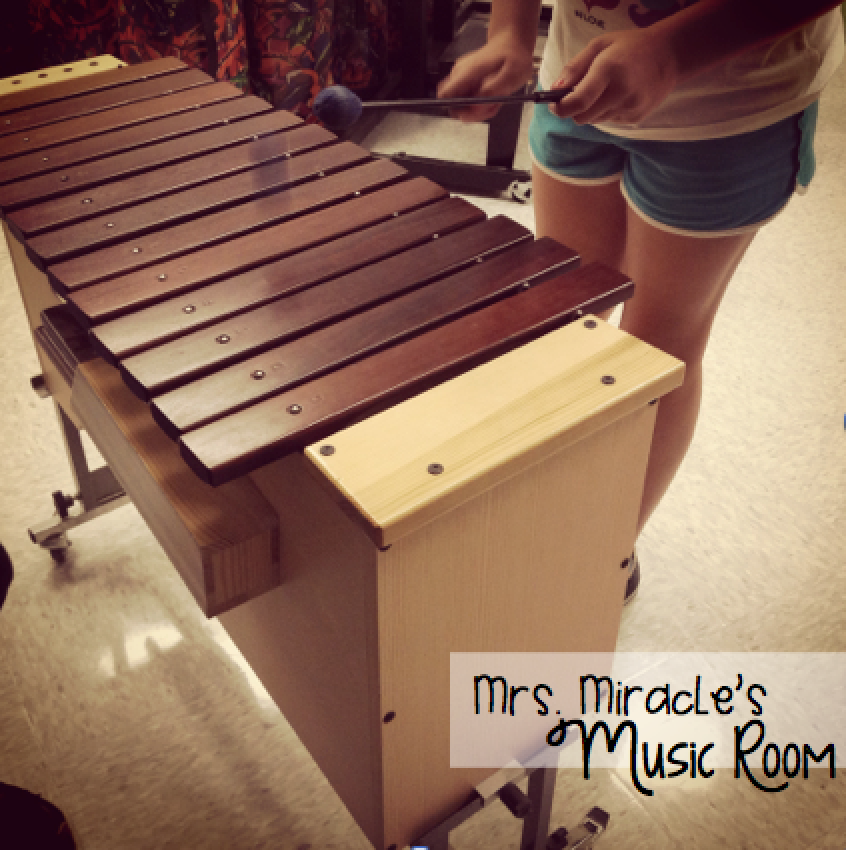
There is such a variety of assessments that can be taken at the barred instruments alone, depending on the grade level. Can students keep a steady beat? Can they alternate between two bars to the beat? Can they play an ostinato? Can they perform a piece like I discussed above? Think about what your goals are for each grade level and plan accordingly.


Assessment idea #2: Rhythmic understanding

Variety in assessment: How to offer a variety of assessment opportunities in the music classroom!


Under the umbrella of rhythm there are many different ways to assess students. When I look at any given marking period, I try to make sure I'm not focusing solely on rhythm, as I will not get a "big picture" idea of how a student who is struggling with rhythm is doing in all musical areas. When thinking about rhythm, say for ta and ti-ti, I focus on the following (and make these as separate formative or summative assessments):
  • Can students read rhythm patterns? For this, students could use the assessment found in my "Ghost Patterns" set.
  • Can students write rhythm patterns? For this, students could use popsicle stick manipulatives to write different patterns, or rhythm manipulatives as shown above.
  • Can students identify rhythm patterns? For this, students could use the "Which animal" game for ta and ti-ti.
  • Can students create rhythm patterns? For this, you could clap and say a pattern with ta and ti-ti and students have to say something different back. You could also have them create a composition on non-pitched percussion or barred instruments in C pentatonic!
Assessment idea #3: Melodic understanding

Variety in assessment: How to offer a variety of assessment opportunities in the music classroom!


Under the umbrella of melody there are also many different ways to assess students. Again, I try to make sure I don't have all assessments focused on melody, as this is not representative for those who struggle specifically with melody. When thinking about melody, say for sol and mi, I focus on the following (and make these as separate formative or summative assessments):
  • Can students read melodic patterns? For this, students could use the assessment found in my "Halloween patterns" set (that many of you just downloaded for free yesterday!)
  • Can students write melodic patterns? For this, students could use solfa manipulatives.
  • Can students write on the staff? I start off with my first graders finding lines and spaces on the staff, like described in this blog post.
  • Can students identify melodic patterns, by sight and/or by sound? For this, students could use the "Under the sea stick-to-staff" game for sol and mi; you can download a sampler for free here.
  • Can students create melodic patterns? For this, you could sing a pattern with sol and mi and students have to say something different back. You could also have them create a composition on sol and mi on barred instruments!
Assessment idea #4: Solo singing
I like to hear at least a few students every day sing individually. This may seem daunting, but once students are used to singing by themselves, it's really not a big deal (at least, for the vast majority.) I compare it to a reading teacher needing to hear students read by themselves. Every day, I use greetings to say hello to students and hear how they are doing, what they will do this weekend, where they went on vacation, etc...but they are using their singing voices the whole time! I also love to use singing games such as "Come back home my little chicks" to have students showcase their pitch-matching. Students sometimes forget they are singing by themselves with games because they are so focused on being "it"! Here is the song and game:

Come back home my little chicks: A great singing game with solos! Blog post also includes a variety of assessments for the music room!

Assessment idea #5: Listening
As music teachers, we want students to be able to listen to a piece of music and identify patterns, instruments, moods, etc. We also want students to be able to identify composers and titles of pieces. A great product I've found for assessing listening is Cori Bloom's "Music Listening Worksheets," which gives students the opportunity to articulate what they hear in a piece of music and how it makes them feel. I'm hoping to do a few of these as assessments this year!

Assessment idea #6: Identifying notes on the treble clef staff
After students have an understanding of solfa and what it looks like on the staff, I teach them how to transfer that knowledge to identifying letter names on the treble clef staff. I wrote this blog post about my process; I start with lines first, then go to spaces. Here is a freebie you could use to assess their understanding of lines and spaces...students try to get faster and faster in the one minute they have to identify!

Let's say we are just looking at one grade level and one marking period; for this example let's use third grade. For a true variety of assessments, students may be assessed on their pitch-matching, their ability to identify notes on the treble clef staff, their rhythmic reading of ti-tika, their melodic writing of low la with solfa manipulatives, and their ability to identify instruments within a piece of music. The wide variety of these assessments allows you as the teacher to truly get a picture of well-rounded musicians within your school, and allows your students to "shine" and show what they truly know and can do!

Any other ideas? Feel free to comment below. Have a great day!

latest videos

ON YOUTUBE